The ISE evaluation license gives you 90 days of full access and after that you won’t be able to make any changes. Currently, my server has 28 days remaining:

As I intend to keep labbing, I’m going to perform a backup and restore where I’ll restore the configuration on another VM that I’ll be installing. Note that this can be automated, but in this post we’re going to focus on the process of doing it manually to understand what steps are involved.
The steps that will be performed are:
- Setup a SFTP repository to use for backups.
- Take a configuration backup of existing node.
- Take an operational backup of existing node.
- Export trusted- and system certificates of existing node.
- Install a new VM.
- Restore the configuration from the configuration backup.
The configuration backup will give us everything we need to restore all the system settings and policies. The operational backup gives us data such as logs. While the configuration backup includes the trusted- and system certificates, it’s good to also export them separately in case you need to perform a restore using another method.
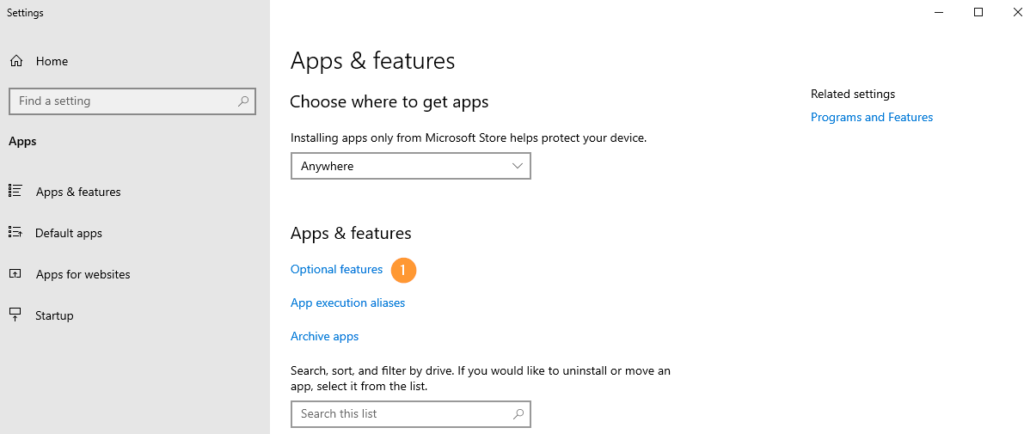
The first thing I’m going to do is to install SFTP on my Windows server using OpenSSH. Go to Apps & Features and click Optional Features:
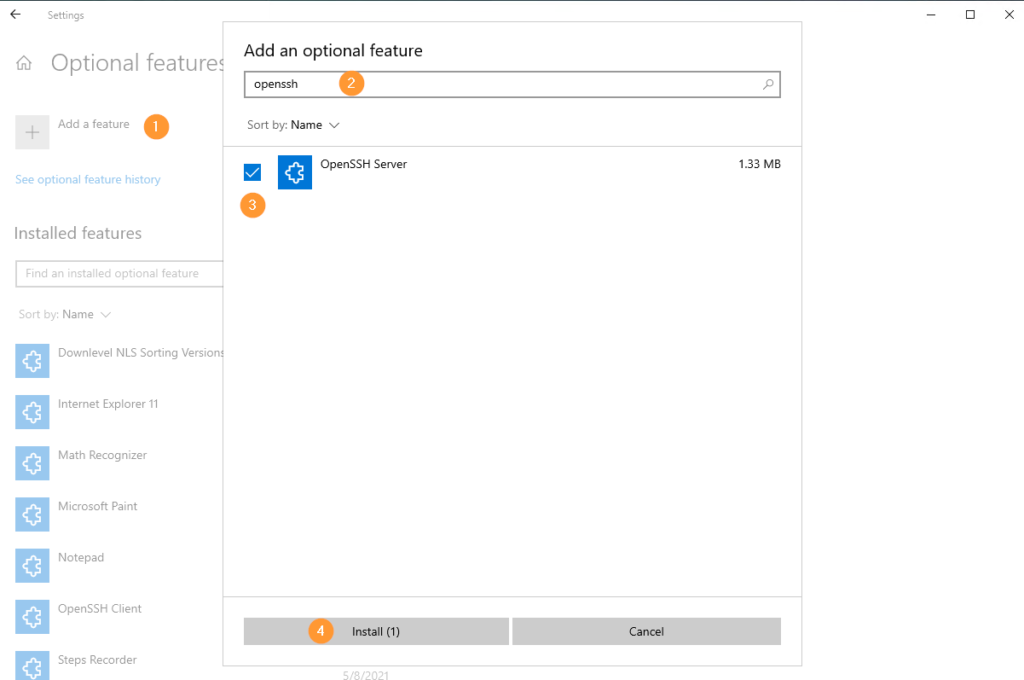
Then, click Add a feature, search for openssh, select OpenSSH Server and then click Install:
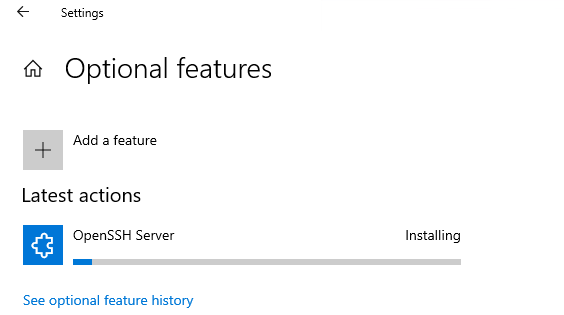
The installation starts:
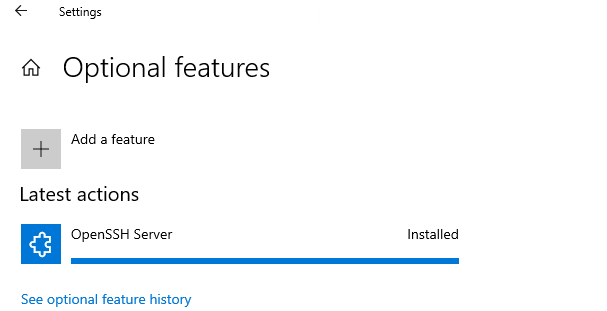
Installation is completed:
Now go to services:

Note that the services are not running and they will not start automatically. Right click each of these two service and select Properties. Then set the service to start automatically and start it:
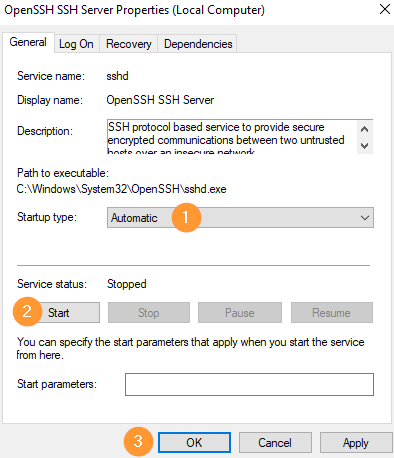
The services are now running:

Next, I’ll create a directory on C: named SFTPRoot:

Then I’ll navigate to C:\ProgramData\ssh. You may have to type this in file explorer since it’s a hidden directory:
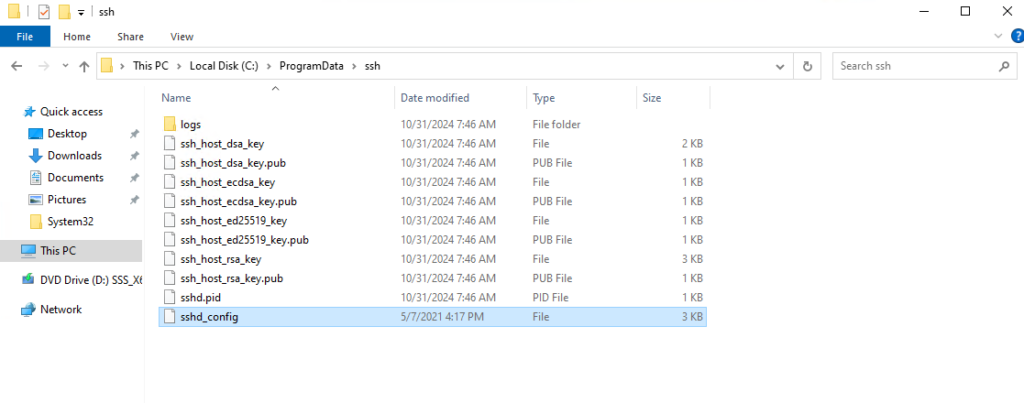
Select sshd_config file and open it with Notepad:
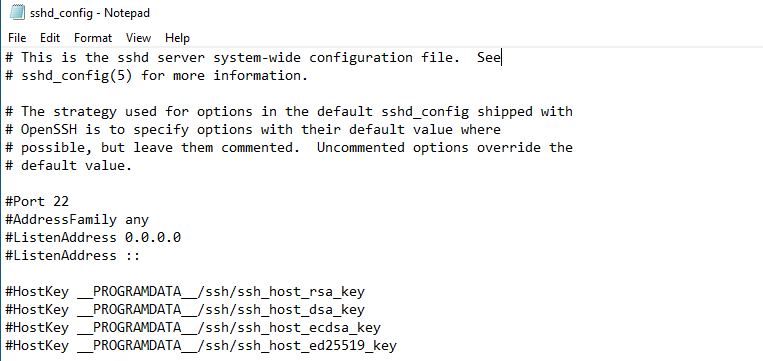
Search for ChrootDirectory:
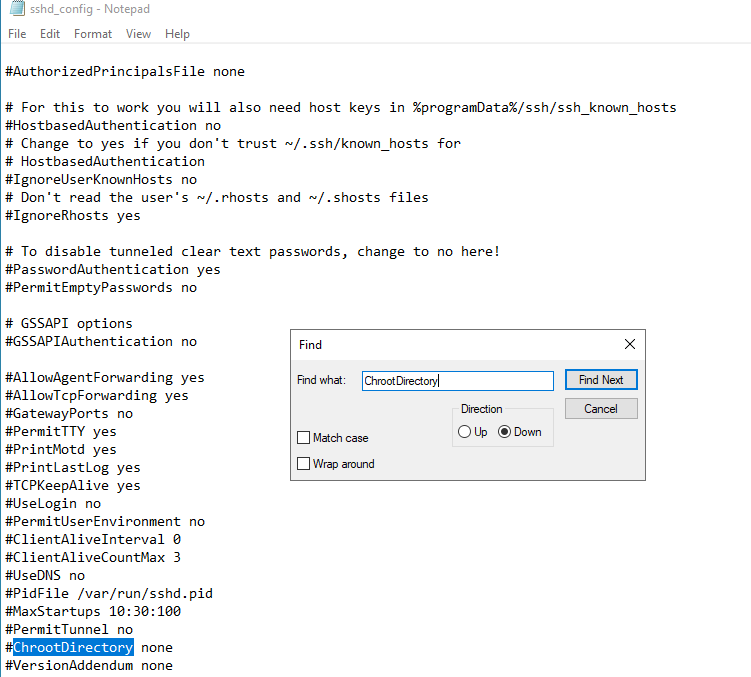
Uncomment this line and set it to C:\SFTPRoot:
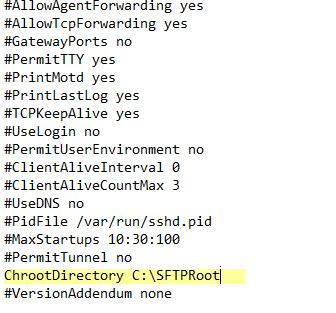
Don’t forget to save the file.
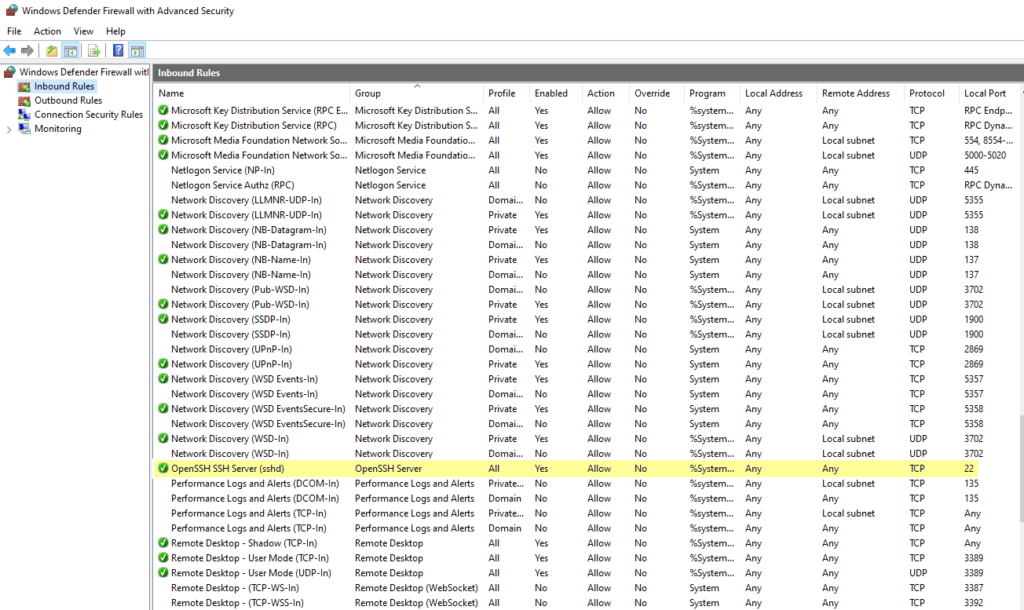
Next I’ll verify that the firewall will allow inbound connections to port 22:
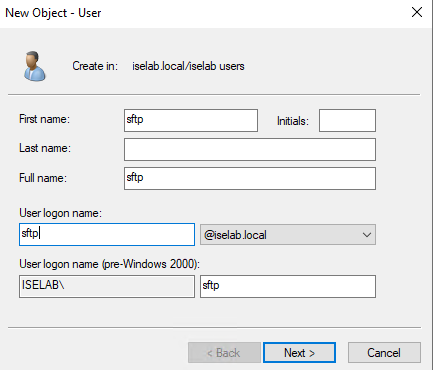
I’ll add a user to AD to be used for SFTP:
Then I’ll use WinSCP on my computer to test that the login works:
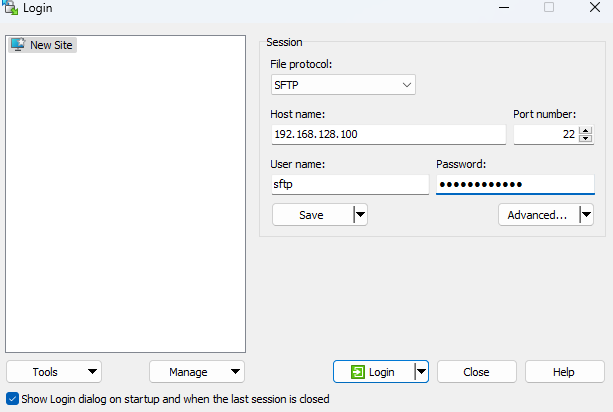
This is working so now I can move on to setting up a repository in ISE. Go to Administration -> Backup and Restore under System, scroll down and then select Add Repository:
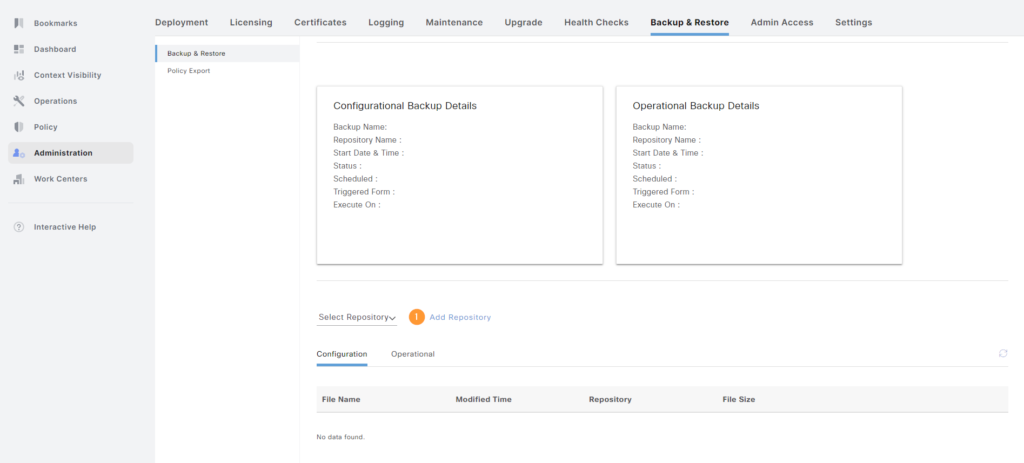
This brings up a repository list. Click + Add:

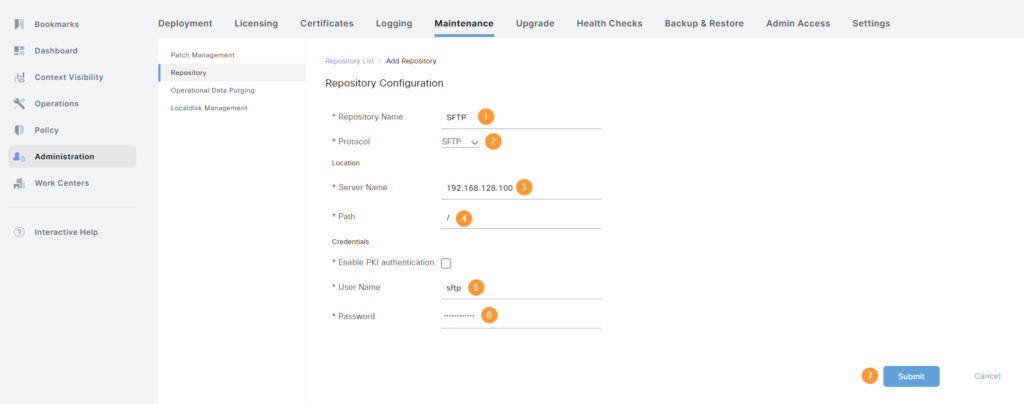
Enter all the information such as name, protocol, IP address/FQDN, path, credentials, and then click Submit:
This will produce a warning. Click OK:
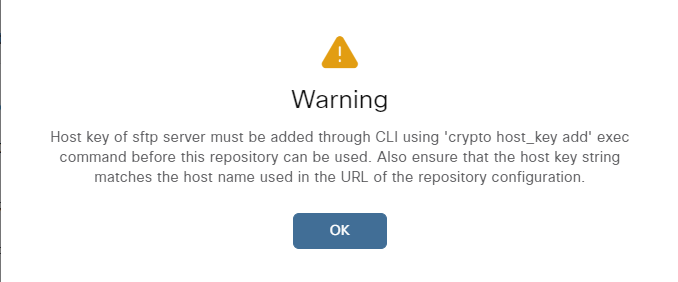
As instructed, host key must be added. We’ll have to SSH to ISE and add the host key using the following command:
ise01/admin#crypto host_key add host 192.168.128.100
host key fingerprint added
# Host 192.168.128.100 found: line 1
192.168.128.100 RSA SHA256:1B9OvbhI5uNq/x/sFKGaE2KcSIr9oBdHUW7r+6omgEc
The repository should now be OK to use. We’ll validate it by selecting it and clicking Validate:

If it works, you’ll get a success message:

Now we’ll go back to Backup & Restore and click Backup Now:

Give the backup a name, select the repository and you also have to define an encryption key:
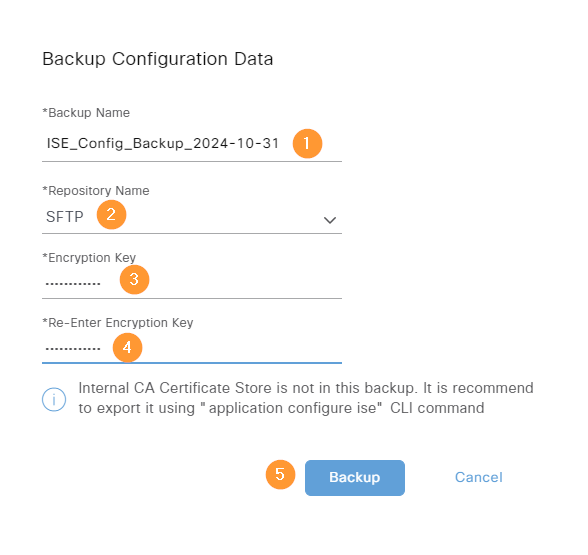
The backup is initiated:
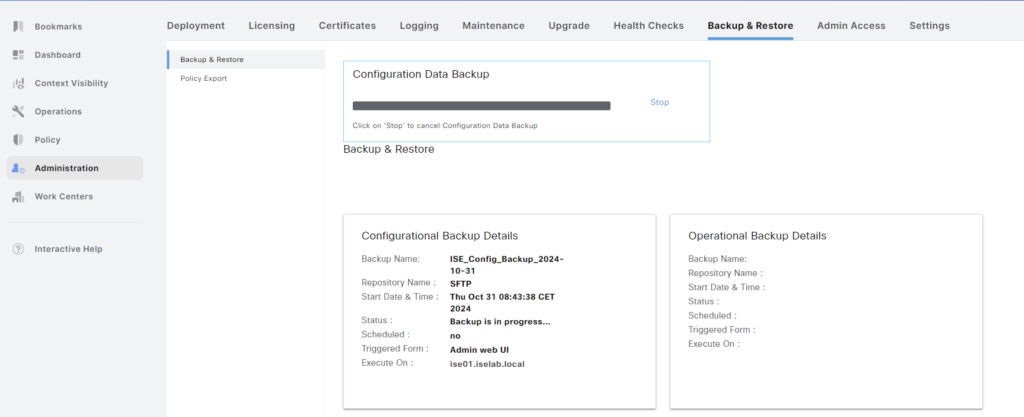
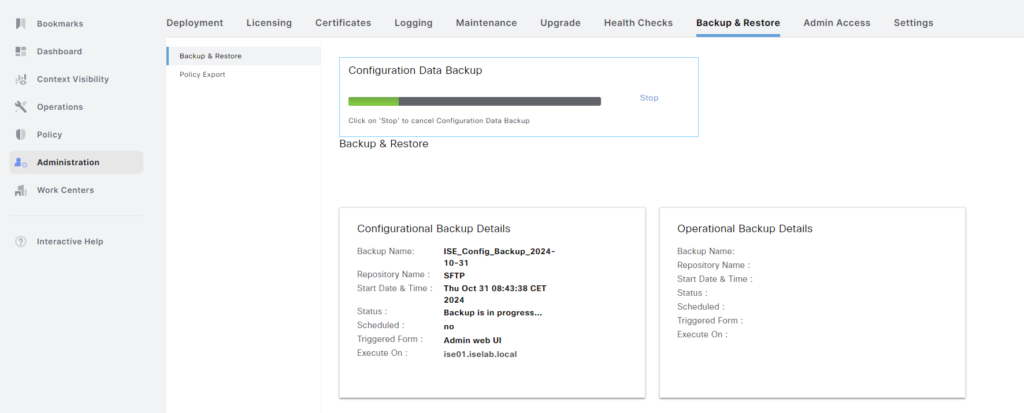
The status bar will update with the progress:
The backup is now complete:

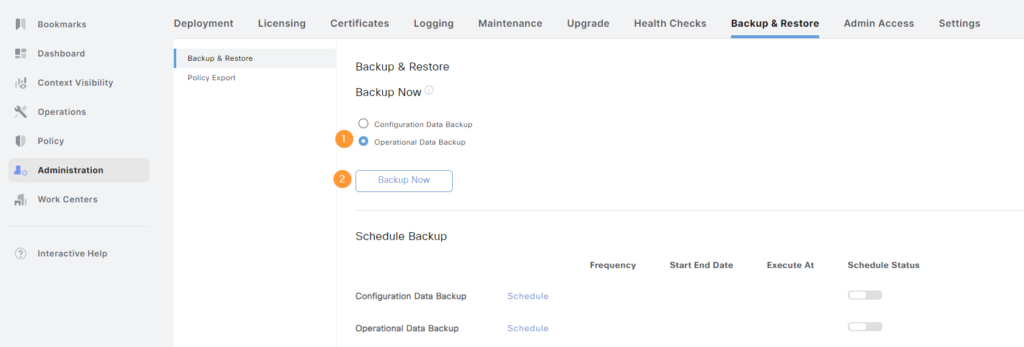
Next, we’ll take also an operational backup:
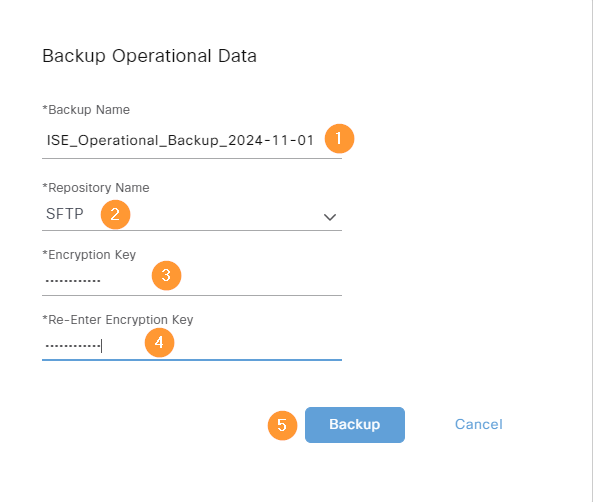
Provide all the information needed and click Backup:
The backup is complete:

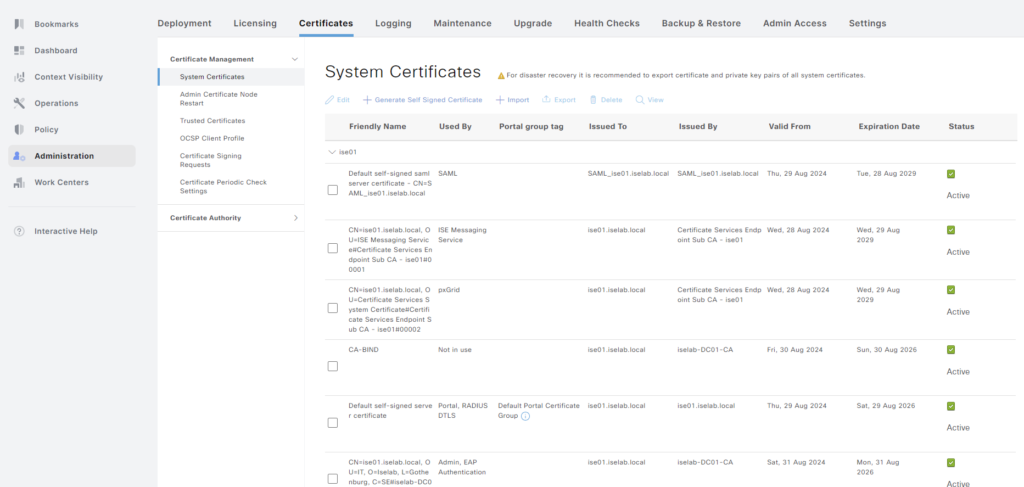
Next, we’re going to export the system certificate. Go to Administration -> Certificates under System:
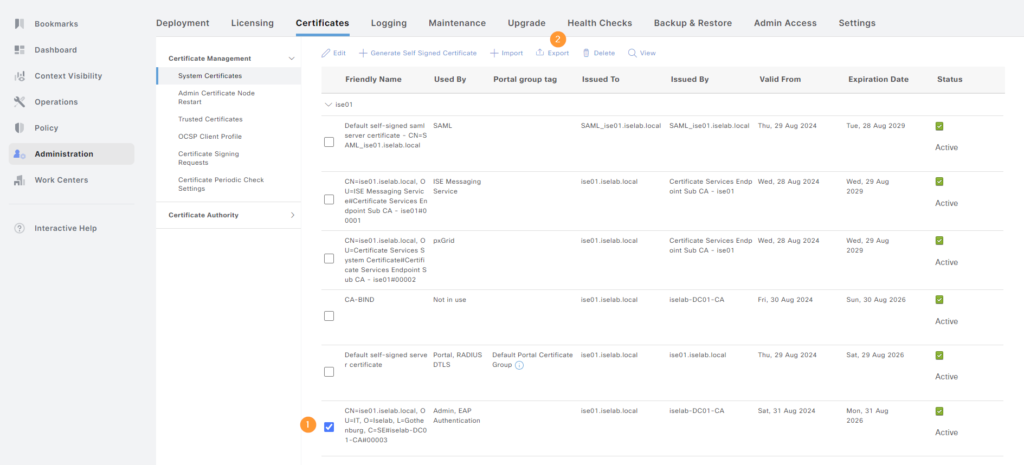
Then, select the certificate to be exported and click Export:
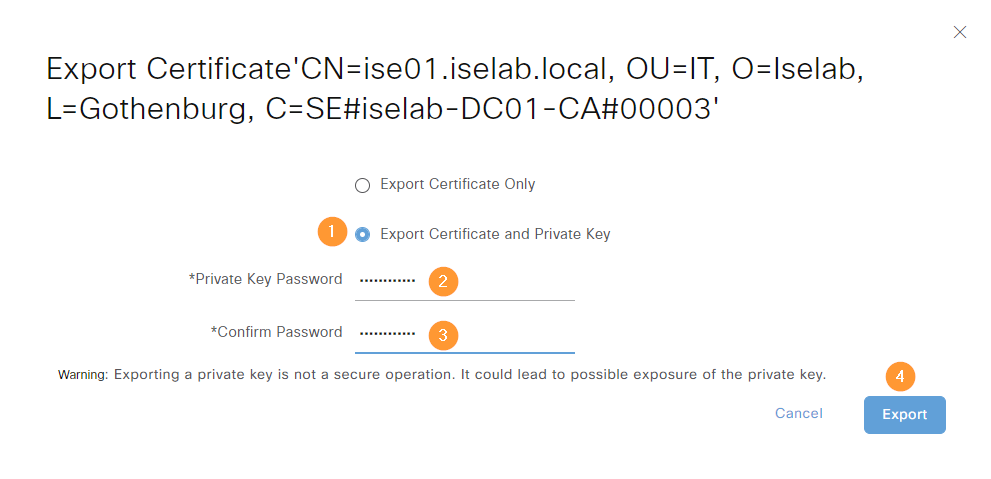
We’ll export both the cert and the private key. An encryption key must be used and will be provided if we need to restore the certificate:
A download will be initiated where the cert is stored as a zip file.
I’ll repeat the process for the Root CA cert:
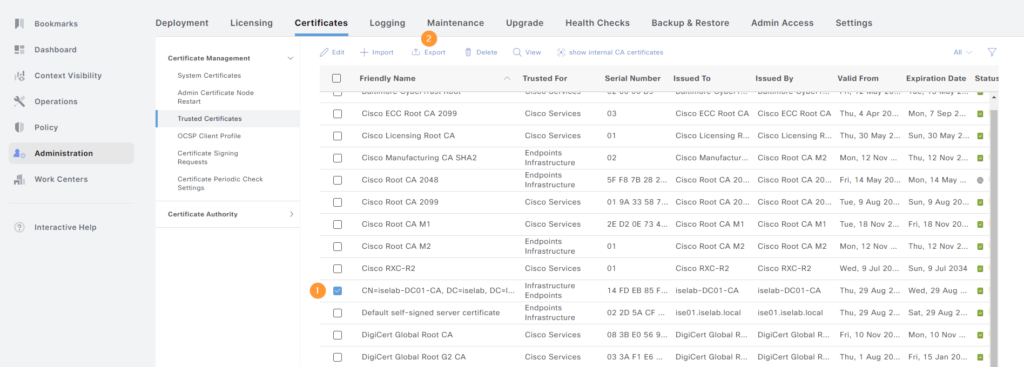
This file will be downloaded as a .pem.
We now have a configuration backup, operational backup, system certificate, and root CA certificate. That’s all we need to be able to install a new VM and restore. Next I’m going to power off this VM, then install from an OVA using the same IP as the existing one.
The new VM has been powered on and I’ve added the same information as the previous VM:
Press 'Ctrl-C' to abort setup
Enter hostname[]: ise01
Enter IP address []: 192.168.128.102
Enter IP netmask []: 255.255.255.0
Enter IP default gateway []: 192.168.128.1
Do you want to configure IPv6 address? Y/N [N]: N
Enter default DNS domain []: iselab.local
Enter primary nameserver []: 192.168.128.100
Add secondary nameserver? Y/N [N]: N
Enter NTP server[time.nist.gov]: ntp.netnod.se
Add another NTP server? Y/N [N]: N
Enter system timezone[UTC]: CET
Enable SSH service? Y/N [N]: Y
Enter username [admin]: admin
Enter password:
Enter password again:
Bringing up the network interface...
ISE is now installing…
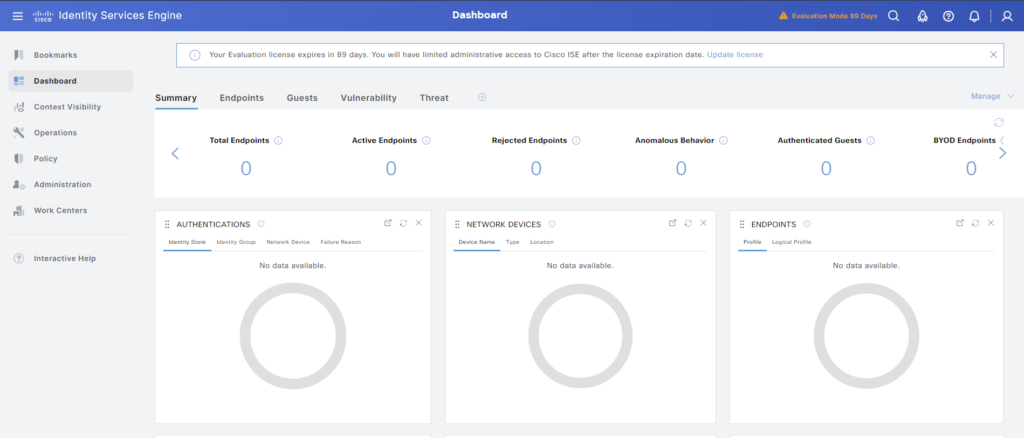
After logging in, there is 89 days remaining on the license:
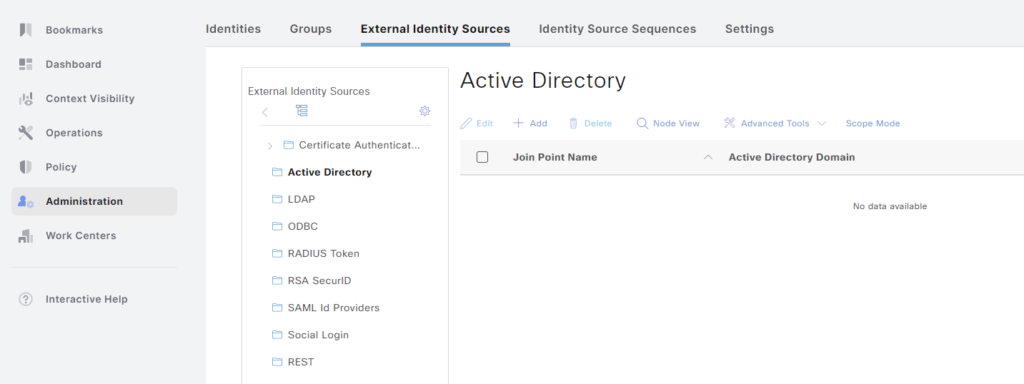
Everything is empty, there is no AD join point:
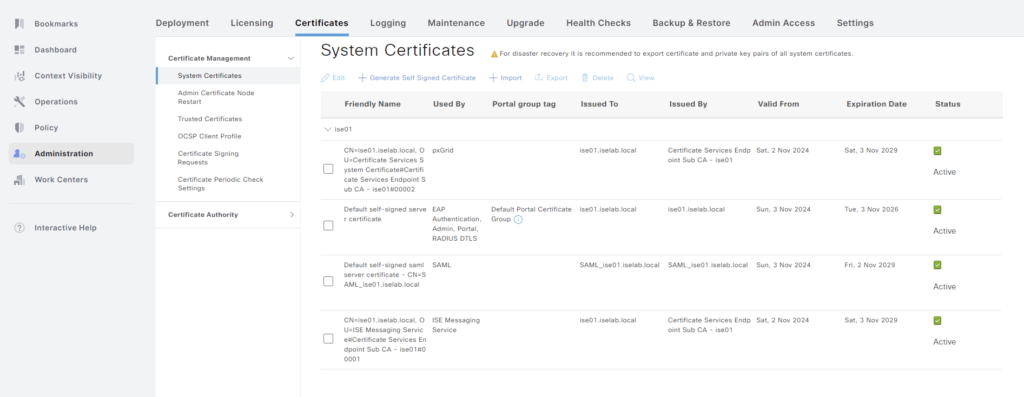
Only the default self-signed certificate is available:
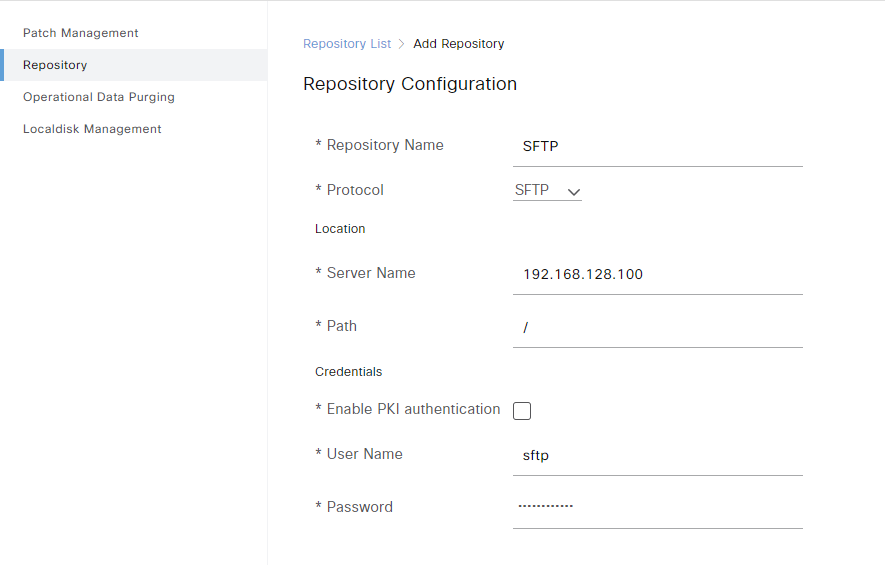
Now let’s attempt to restore from the backup. Go to Administration -> Backup & Restore under System. Then we’ll have to add a repository to restore from. This is a repeat of what we did when backing up:
Don’t forget to add the crypto host key:
ise01/admin#crypto host_key add host 192.168.128.100
host key fingerprint added
# Host 192.168.128.100 found: line 1
192.168.128.100 RSA SHA256:1B9OvbhI5uNq/x/sFKGaE2KcSIr9oBdHUW7r+6omgEc
Now we can select the repository in Backup & Restore:

This will provide a list of files in the repository which we can restore from:

We’ll have to provide the encryption key that we used when saving the backup. We’re not going to restore ADE-OS, as the node already has the correct IP and DNS settings, etc:
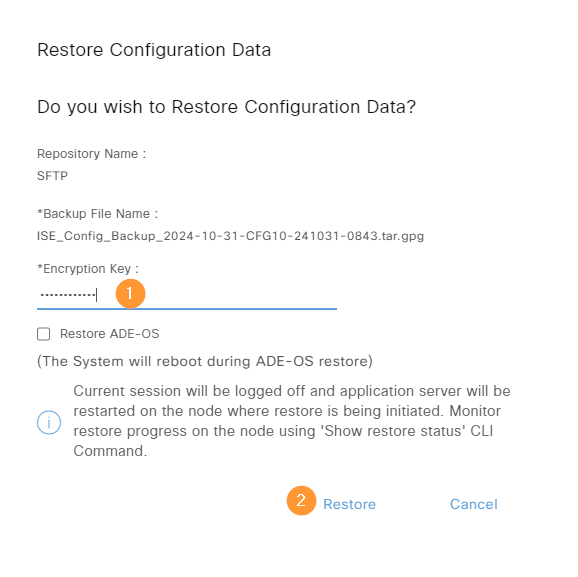
The restore is now running:
ise01/admin#show restore status
%% Configuration restore status
%% ----------------------------
%      backup name: ISE_Config_Backup_2024-10-31-CFG10-241031-0843.tar.gpg
%       repository: SFTP
%       start date: Sun Nov 03 09:46:18 CET 2024
%        scheduled: no
%   triggered from: Admin web UI
%             host: ise01.iselab.local
%           status: Restore is in progress...
%       progress %: 30
% progress message: Extracting backup data

%% Operation restore status
%% ------------------------
%  No data found. Try 'show restore history' or ISE operation audit report
The process will take quite some time so be patient. The process is now complete:
ise01/admin#show restore status
%% Configuration restore status
%% ----------------------------
%      backup name: ISE_Config_Backup_2024-10-31-CFG10-241031-0843.tar.gpg
%       repository: SFTP
%       start date: Sun Nov 03 09:46:18 CET 2024
%        scheduled: no
%   triggered from: Admin web UI
%             host: ise01.iselab.local
%           status: restore ISE_Config_Backup_2024-10-31-CFG10-241031-0843.tar.gpg from repository SFTP: success

%% Operation restore status
%% ------------------------
%  No data found. Try 'show restore history' or ISE operation audit report
When the restore is completed, I can now see that the certificate used for EAP has been restored:

Our NADs have also been restored:

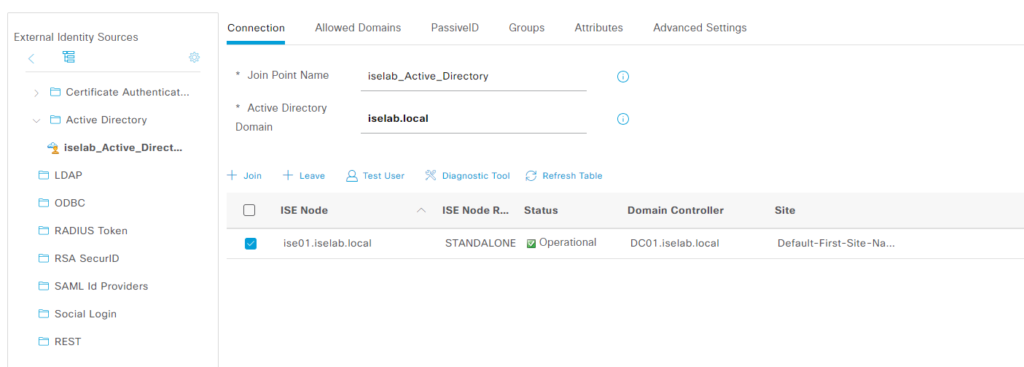
The AD join point has been restored, but is not active:

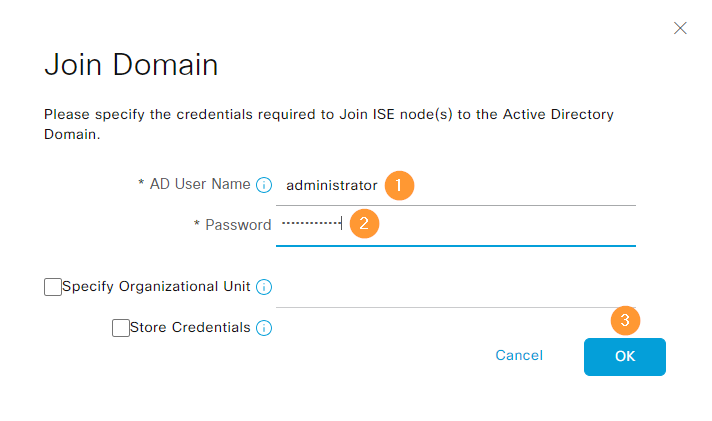
We’ll have to activate it again by selecting it and clicking + Join:

Supply the credentials and click OK:
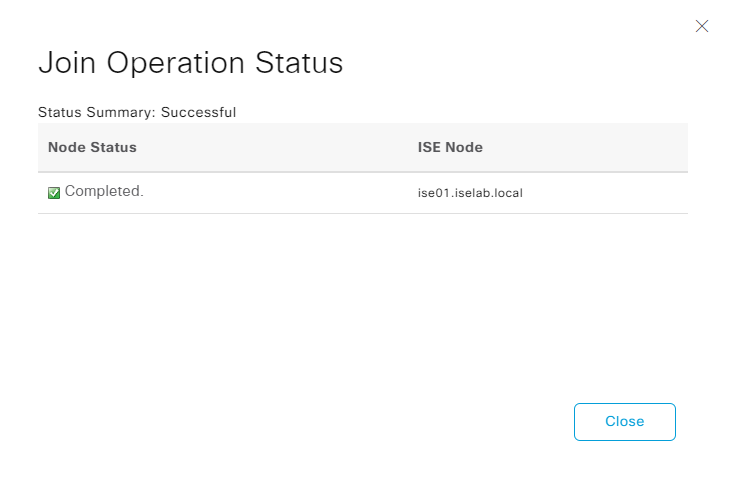
The join succeeded:
It is now once again operational:
Everything is now setup to be able to use this ISE. As we didn’t restore any operational data yet, the TACACS Live Logs are empty:

We can restore the data by going to Backup & Restore and restoring operational data:

Provide the encryption key and click Restore:
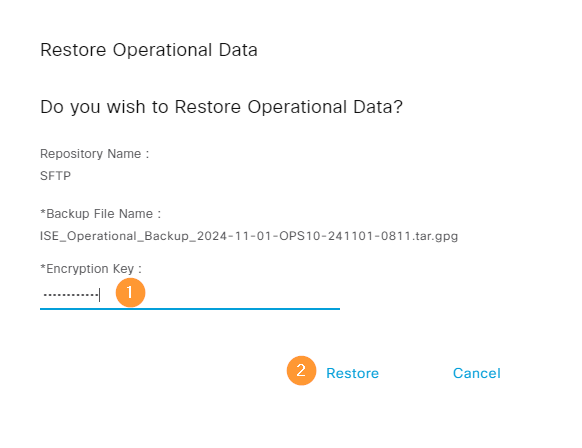
At this point, the GUI was not playing nice with restoring the operational data so I resorted to CLI:
ise01/admin#restore ISE_Operational_Backup_2024-11-01-OPS10-241101-0811.tar.gpg repository SFTP encryption-key <redacted>
The restore process is now running:
ise01/admin#show restore status
%% Configuration restore status
%% ----------------------------
%      backup name: ISE_Config_Backup_2024-10-31-CFG10-241031-0843.tar.gpg
%       repository: SFTP
%       start date: Sun Nov 03 09:46:18 CET 2024
%        scheduled: no
%   triggered from: Admin web UI
%             host: ise01.iselab.local
%           status: restore ISE_Config_Backup_2024-10-31-CFG10-241031-0843.tar.gpg from repository SFTP: success

%% Operation restore status
%% ------------------------
%      backup name: ISE_Operational_Backup_2024-11-01-OPS10-241101-0811.tar.gpg
%       repository: SFTP
%       start date: Sun Nov  3 11:39:06 CET 2024
%        scheduled: no
%   triggered from: CLI
%             host: ise01.iselab.local
%           status: Restore is in progress
%       progress %: 35
% progress message: Stopping ISE processes required for restore
Restore has completed:
ise01/admin#show restore status
%% Configuration restore status
%% ----------------------------
%      backup name: ISE_Config_Backup_2024-10-31-CFG10-241031-0843.tar.gpg
%       repository: SFTP
%       start date: Sun Nov 03 09:46:18 CET 2024
%        scheduled: no
%   triggered from: Admin web UI
%             host: ise01.iselab.local
%           status: restore ISE_Config_Backup_2024-10-31-CFG10-241031-0843.tar.gpg from repository SFTP: success

%% Operation restore status
%% ------------------------
%      backup name: ISE_Operational_Backup_2024-11-01-OPS10-241101-0811.tar.gpg
%       repository: SFTP
%       start date: Sun Nov  3 11:39:06 CET 2024
%        scheduled: no
%   triggered from: CLI
%             host: ise01.iselab.local
%           status: restore ISE_Operational_Backup_2024-11-01-OPS10-241101-0811.tar.gpg from repository SFTP: success
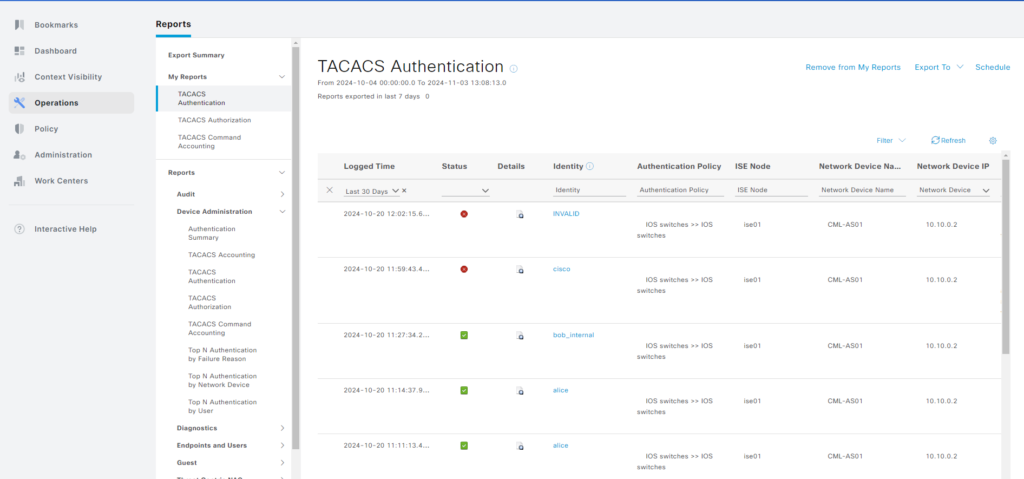
We can now access older data in our reports:
In this post we learned how to backup ISE and then restore from that backup. We learned that there is configuration data and operational data. We also learned that we should always export our certificates, including private keys, in case there are any issues with restoring from backup.